

Tenant Check-Outs: A Guide to Ensuring a Smooth End of Tenancy.
Tenant check-outs mark a critical phase in the rental process. Whether you’re a landlord or a tenant, understanding the steps involved can help ensure a smooth and stress-free transition. A well-managed check-out process protects the interests of both parties, ensures that the property is returned in good condition, and minimises disputes. Here are a few top tips to navigating this important stage.
Notice Period and Final Arrangements
The check-out process begins with the tenant providing notice of their intention to vacate the property and officially give notice to terminate their tenancy.
The length of the notice period typically depends on the terms of the agreement. For landlords, this notice is a cue to start preparing for the property’s next phase, whether that’s finding a new tenant or conducting necessary repairs.
Tenants, on the other hand, should use this time to organise their move and ensure they fulfil any remaining obligations under the agreement. Make sure that the tenant understands the process – a top tip here is for the landlord to contact the tenant, on receipt of notice, noting things for the tenant to consider before check out – drawing their attention to their obligations under the agreement, advising them to notify utility companies where applicable and detailing how the property should be left, cleaned and what to expect during a check out appointment, the process itself and the timescale for the return of their deposit. It’s also a good opportunity to discuss whether there are any reasons for the move out that you should be aware of.
Mostly, it will be a change in circumstances, but it’s always good to double check, in case there is something you should know, in relation to your property or its management.
Pre-Check-Out Inspection
A pre-check-out inspection is an optional, yet highly recommended, step. This inspection allows both parties to review the property’s condition before the official check-out. It gives the tenant an opportunity to address any issues that might result in deductions from their security deposit. For landlords, this inspection provides a clear picture of the property’s condition and helps avoid surprises during the final inspection.
During this inspection, tenants should pay close attention to cleanliness, any damages beyond normal wear and tear, and the working condition of appliances. Addressing these issues in advance can prevent disputes and ensure a smoother final inspection.







Final Inspection and Inventory Check
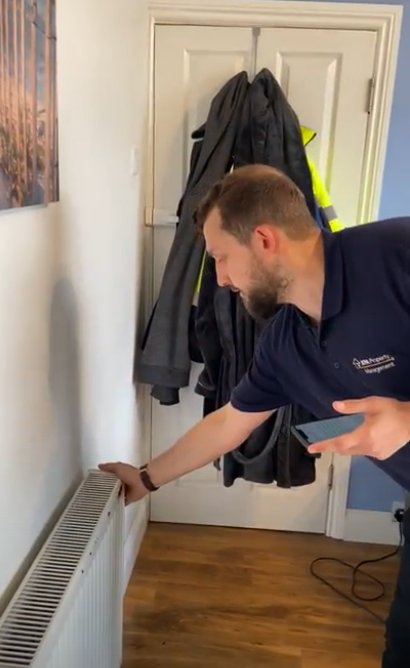
The final inspection is a crucial part of the check-out process. It typically takes place on the last day of the tenancy or shortly after the tenant has vacated the property. The purpose of this inspection is to compare the property’s current condition with the initial inventory report made at the start of the tenancy.
Both parties should attend the inspection, it’s important to make your tenant aware of this and to give good notice of this expectation and it’s essential to refer to the original inventory report during this process. This report serves as a baseline, outlining the condition of the property and its contents when the tenant moved in. Any discrepancies, such as damages or missing items, can be noted and discussed. It also gives the tenant an opportunity to put any discrepancies right, to avoid deductions from the deposit, wherever possible. Bring along any check in report that you prepared and had signed by both you and the tenant, at check in.
Addressing Any Damages and Repairs
Take your time and be thorough. If the inspection reveals damages beyond normal wear and tear, the landlord may request the tenant to cover the cost of repairs. Common issues that may arise include stains on carpets, broken fixtures, or unapproved alterations to the property. It’s crucial for both parties to agree on the cost of repairs, and tenants should always request receipts or estimates to ensure the charges are fair and accurate.
Returning Keys and Finalising Utilities
Once the final inspection is complete, tenants should return all keys, including those for communal areas, gates, bike stores, sheds and garages. It’s also important for tenants to finalise their utility accounts, ensuring that all bills are paid up to the date of their departure. This step prevents future complications for both the tenant and the landlord.
The Return of the Security Deposit
The security deposit must be protected and the tenant is entitled to the return of the whole amount of the deposit provided that they (i) meet the terms of the tenancy agreement; (ii) do not damage the property (beyond fair wear and tear) and (iii) pay all rent and bills. The return of the security deposit is often the final step in the check-out process. Landlords are required to return the deposit or make a claim within 10 days of the end of the tenancy. Any deductions should be clearly itemised and justified, with accompanying evidence, such as photos from the inspection and receipts for repairs.
A smooth tenant check-out process benefits everyone involved. For tenants, it means a hassle-free move with the maximum and speedy return of their security deposit. For landlords, it ensures the property is well-maintained and ready for the next occupant. Clear communication, thorough inspections, and attention to detail are key to making this transition as seamless as possible.
As Landlords and Investors ourselves, we can help and advise on all aspects of your portfolio. If we can help you then give us a call on 0117 440 6789 or email us here together we can make being a landlord simple, passive and stress free!
KPA Property Management offer: student property landlord services, HMO management, landlord property portfolios or letting any property.


